How to Build a RAG Chat App With Agent Cloud and BigQuery
Learn How to Build a RAG Chat App

Developer, Mentor, Writer. Blog: https://www.devtoolsacademy.com/
Introduction
Interacting with your data helps you and your team to gain relevant insights and make informed decisions for your business. Retrieval-augmented generation (RAG) chat applications allow you to chat with your data.
Retrieval-augmented generation enhances the accuracy of large language models by allowing them to consult an external data source before generating an output. The output of these LLMs is based on facts gathered from the embedded data sources.
Agent Cloud is an open-source generative AI platform with a built-in RAG as a Service that enables you to build and deploy LLM-powered conversation chat apps for talking with your data.

Agent Cloud’s RAG as a Service also has a built-in data pipeline that allows you to split, chunk, and embed data from over 300 data sources, including BigQuery.
This article will guide you on how to build a RAG chat application using Agent Cloud to privately and securely talk with your Google BigQuery data.
Prerequisite
This article is a comprehensive guide that takes you on a step-by-step journey, explaining each concept and configuration clearly. No prior experience in building RAG chat apps or interacting with Google BigQuery data is required to follow along.
Setting-Up BigQuery
Let’s set up our BigQuery data warehouse. You may skip this section if your data is on BigQuery already.
Create a Google Cloud Platform account.
Create a new project and navigate into the BigQuery pane.
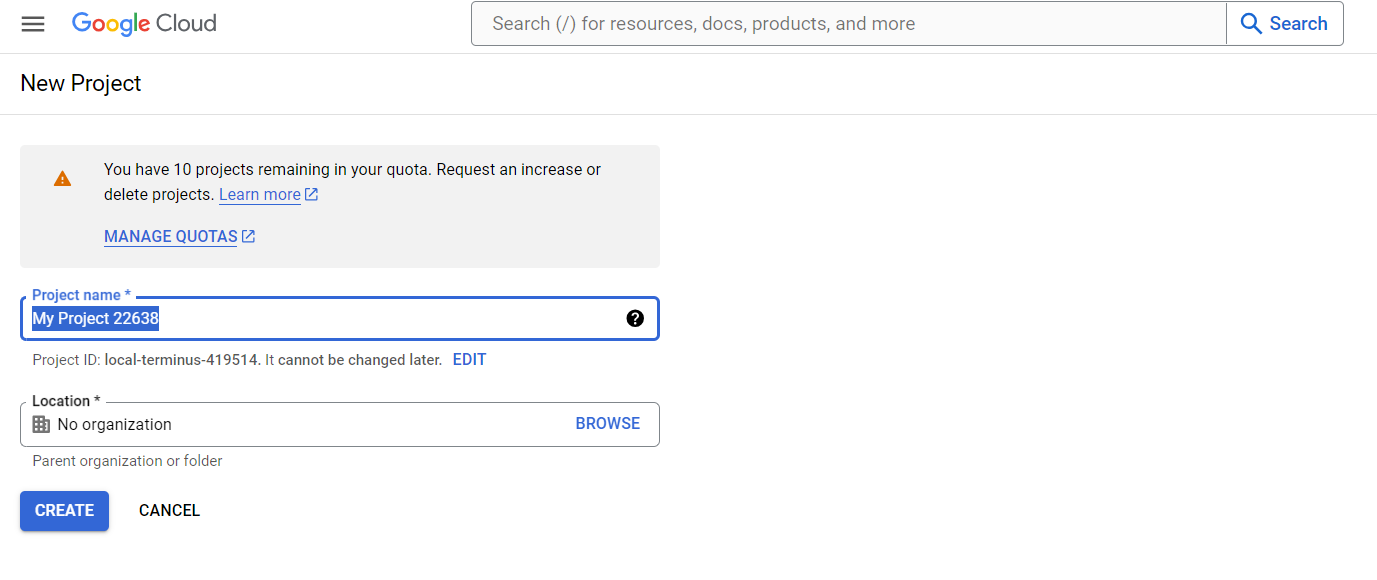
Here, we gave our project the name test-agent-cloud.
You can give yours any name whatever you prefer.
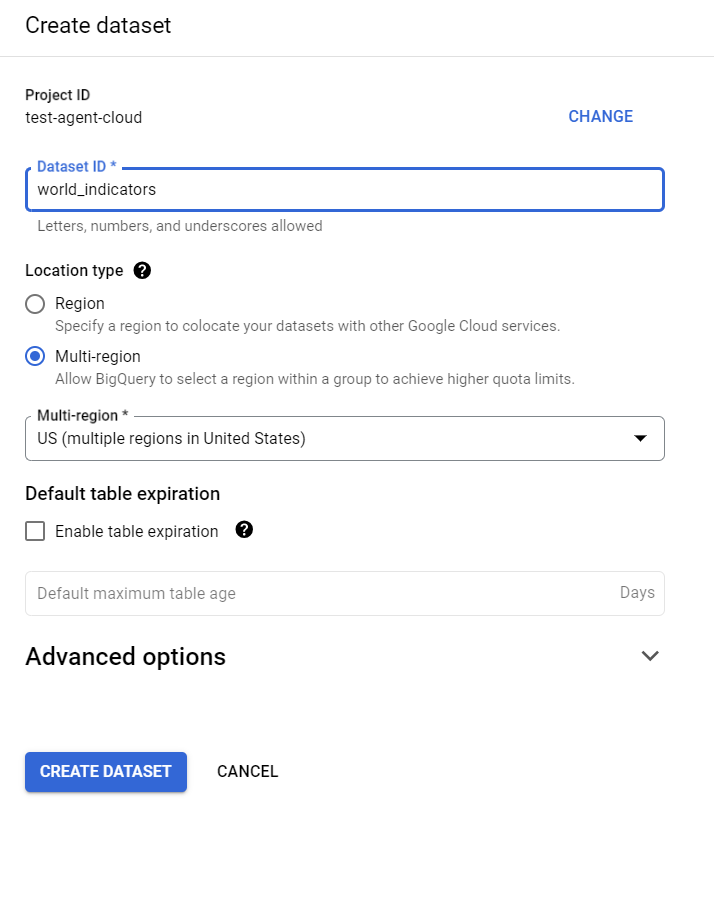
- Create dataset. Click on the kebab menu near your project name and select Create Dataset.

Configure the necessary information for your dataset e.g id and location.
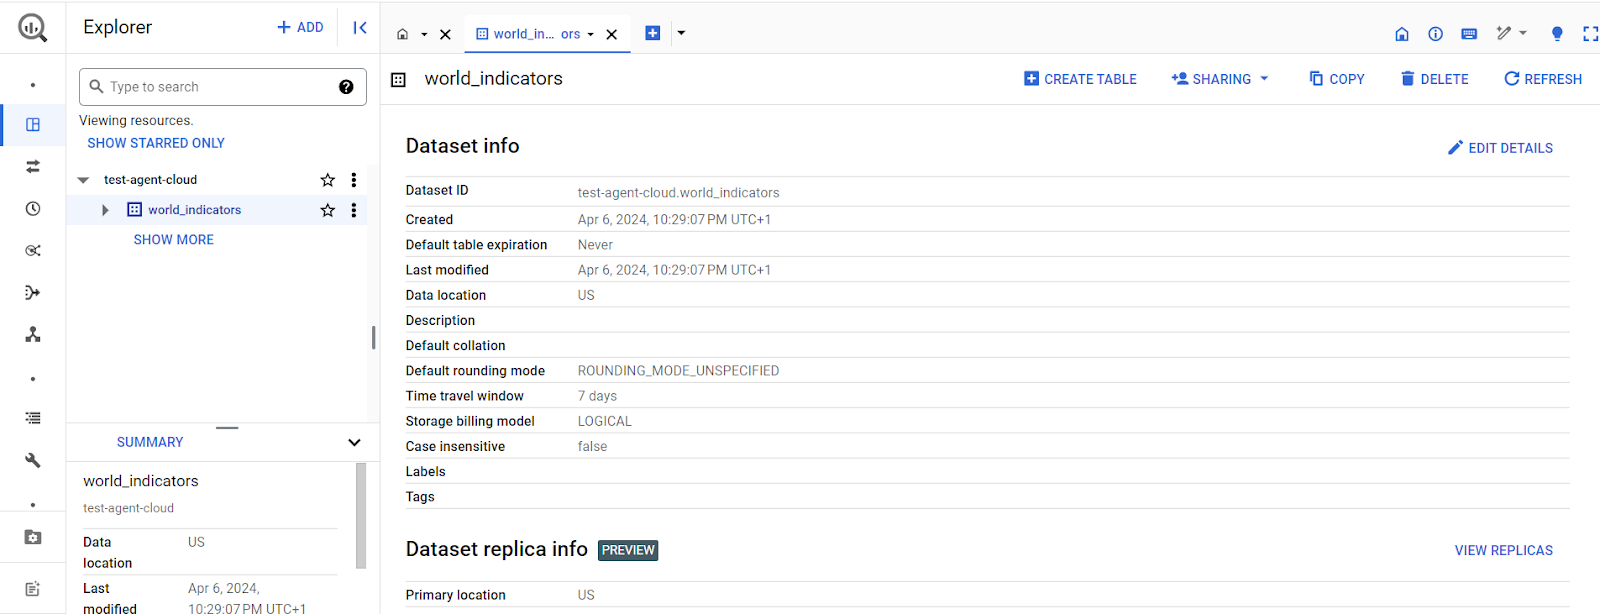
Here are the details of our newly created dataset.
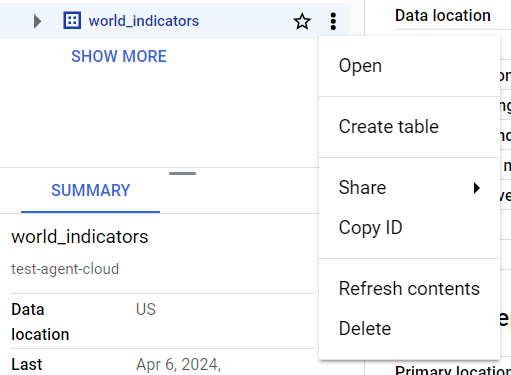
- Create tables inside your dataset. To create tables, click on the kebab button and select Create table.
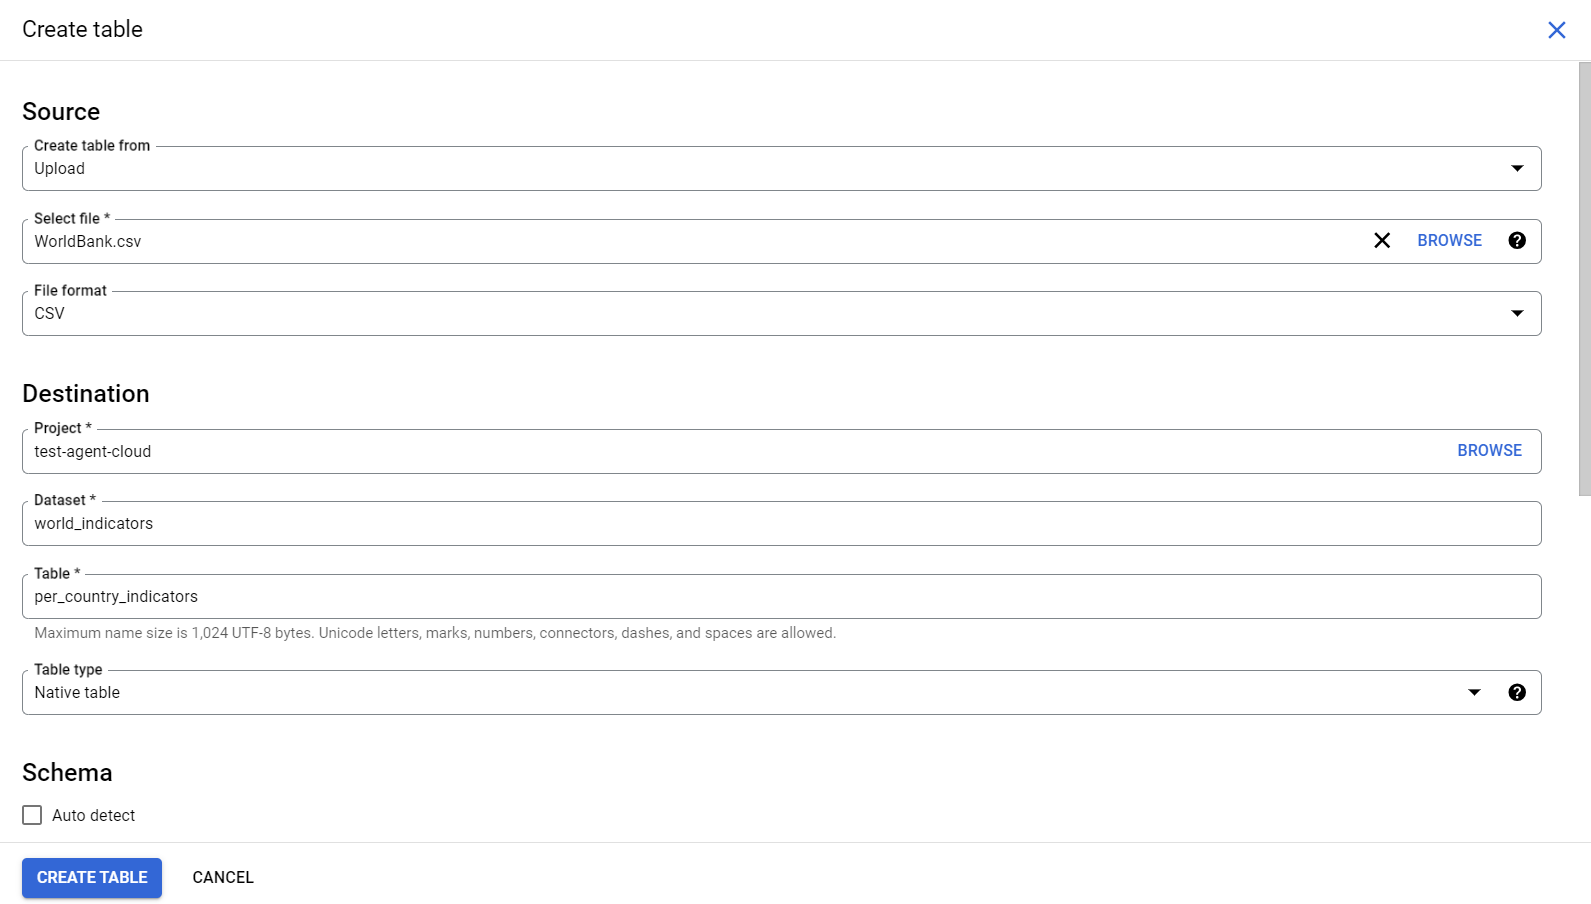
- Add the table data. You can create an empty table, upload data, or add data from Google Cloud Storage, Drive, Bigtable, Amazon S3, and Amazon Blob Storage. In this demo, we will upload the World Economic Indicator dataset, publicly available data on Maven Analytics.
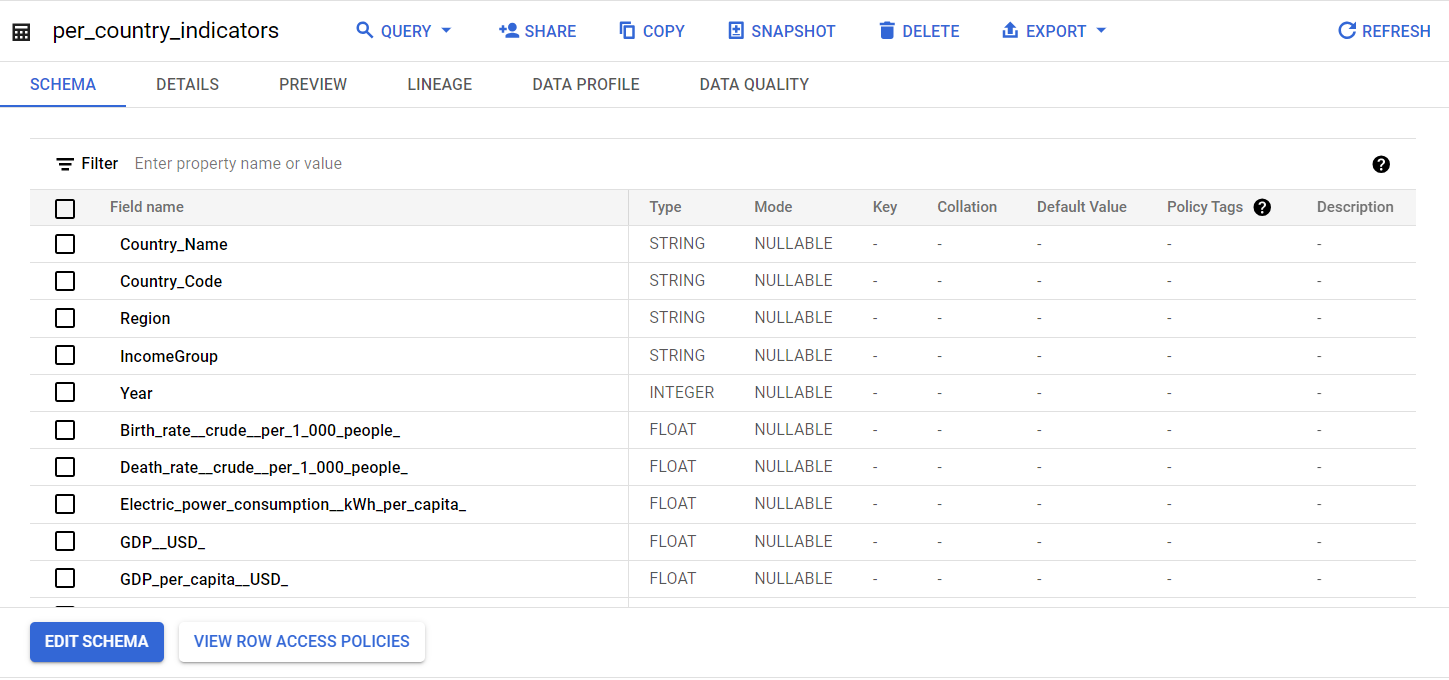
Here is our dataset schema.
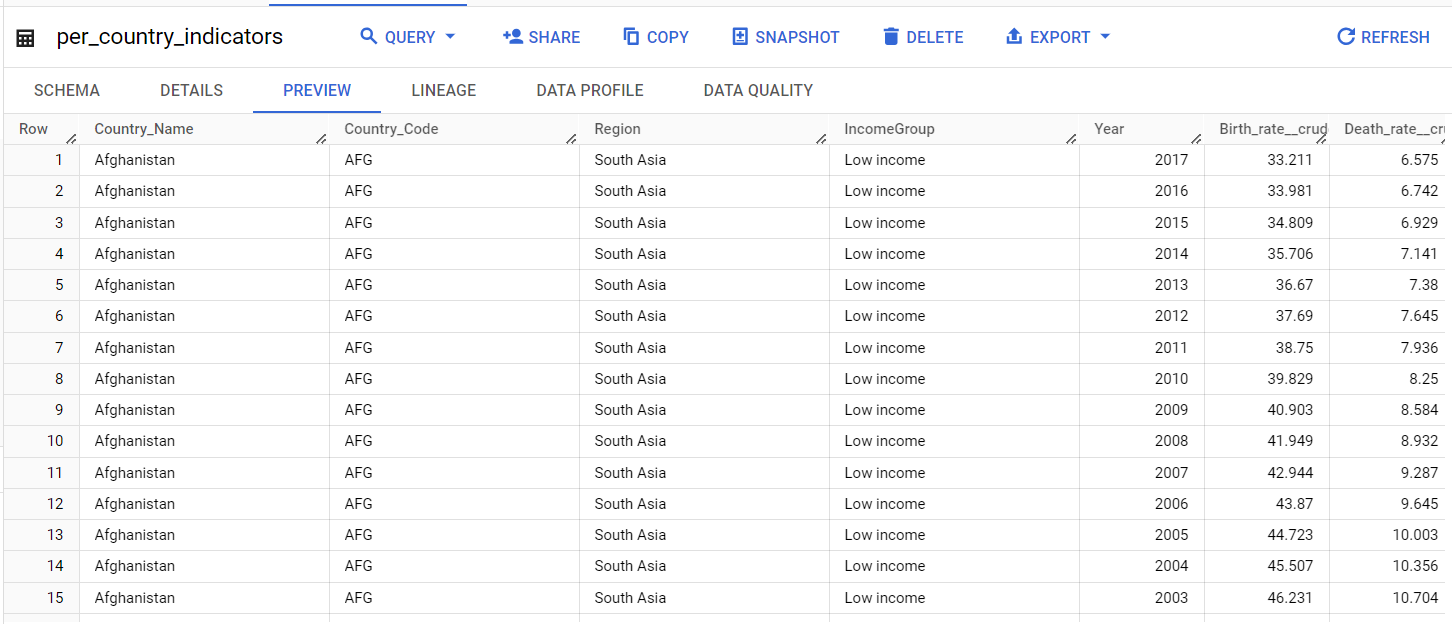
Here is our dataset preview
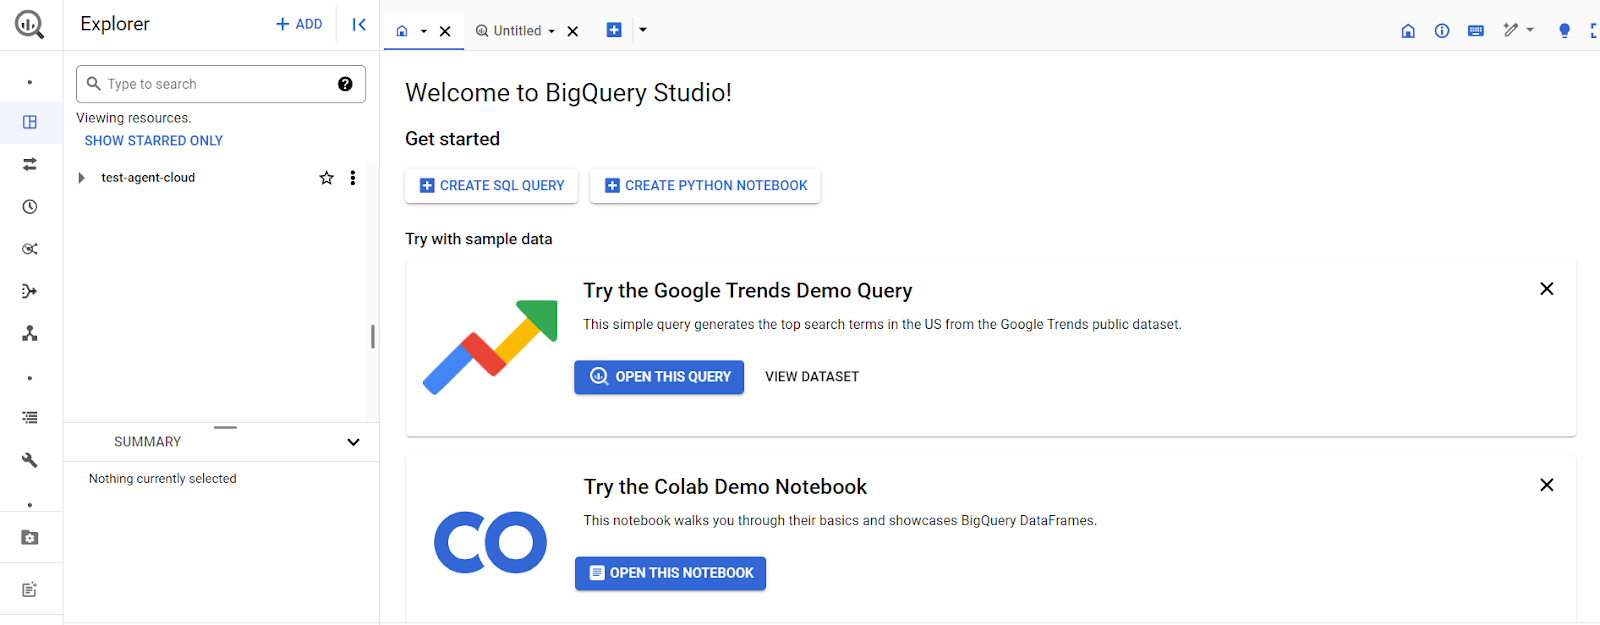
We are done setting up our BigQuery data warehouse. Next, we will setup Agent Cloud on our local machine.
Creating Your GCP Service Account Key
You must provide your GCP service account key to embed your BigQuery data into Agent Cloud. This section will show you how to create a service account. You may skip this section if you have your service account JSON already.
Follow the steps below to create and download your service account key:
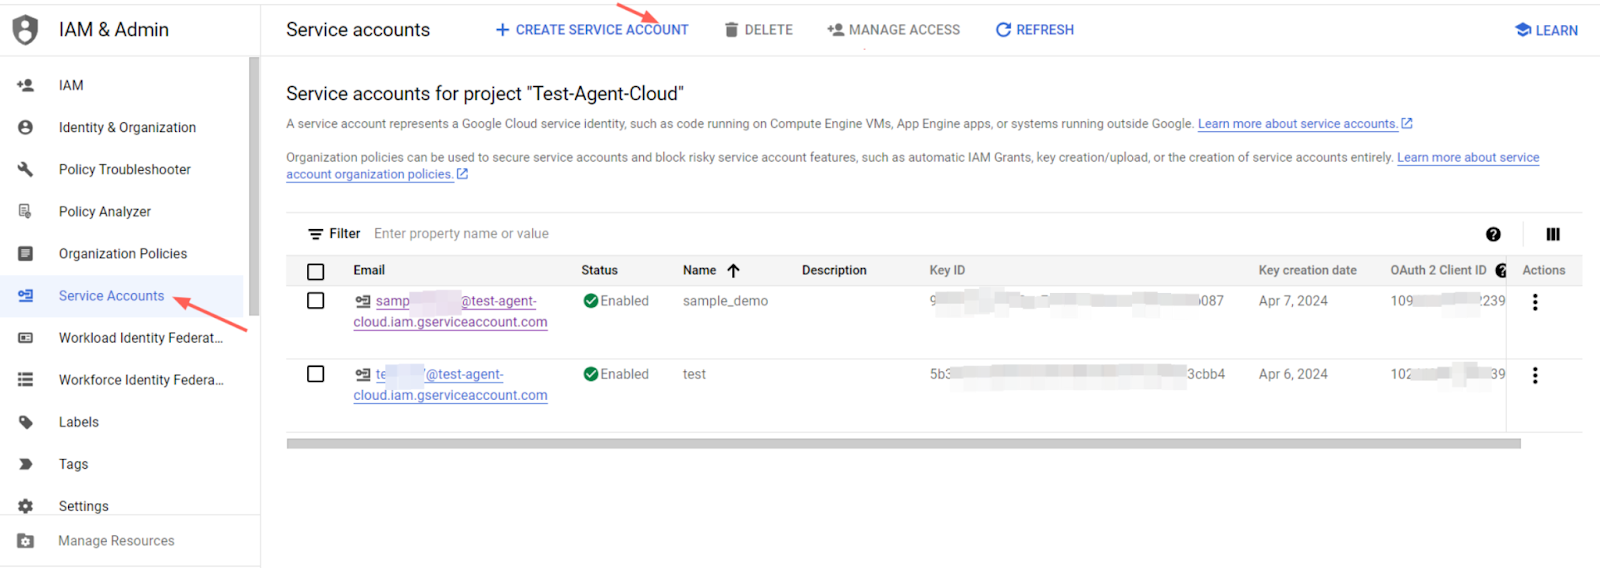
- Inside GCP, navigate to IAM & Admin > Service Accounts and select CREATE SERVICE ACCOUNT.
- Fill in the details for your service account.

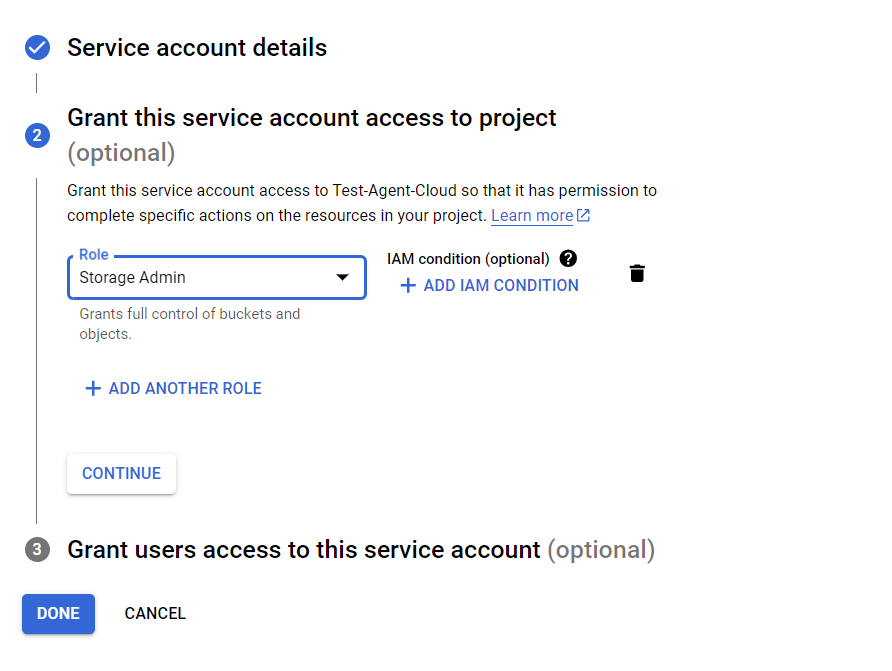
- Assign it a Storage Admin role and click Done.
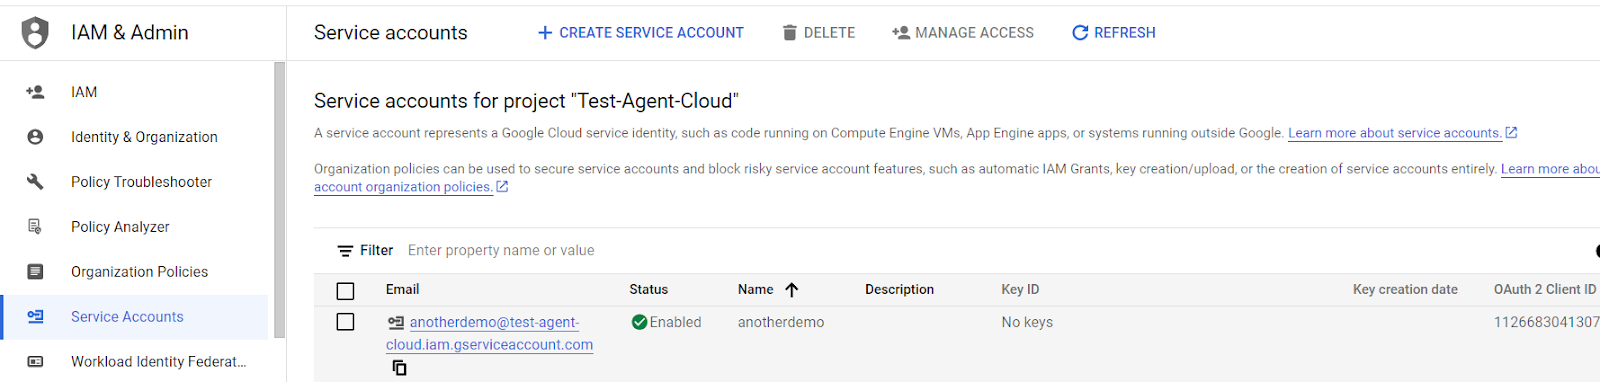
Your new service account is now live, but no key yet.
- Click on the service account email, go to the KEYS tab, select ADD KEY, and then Create new key.
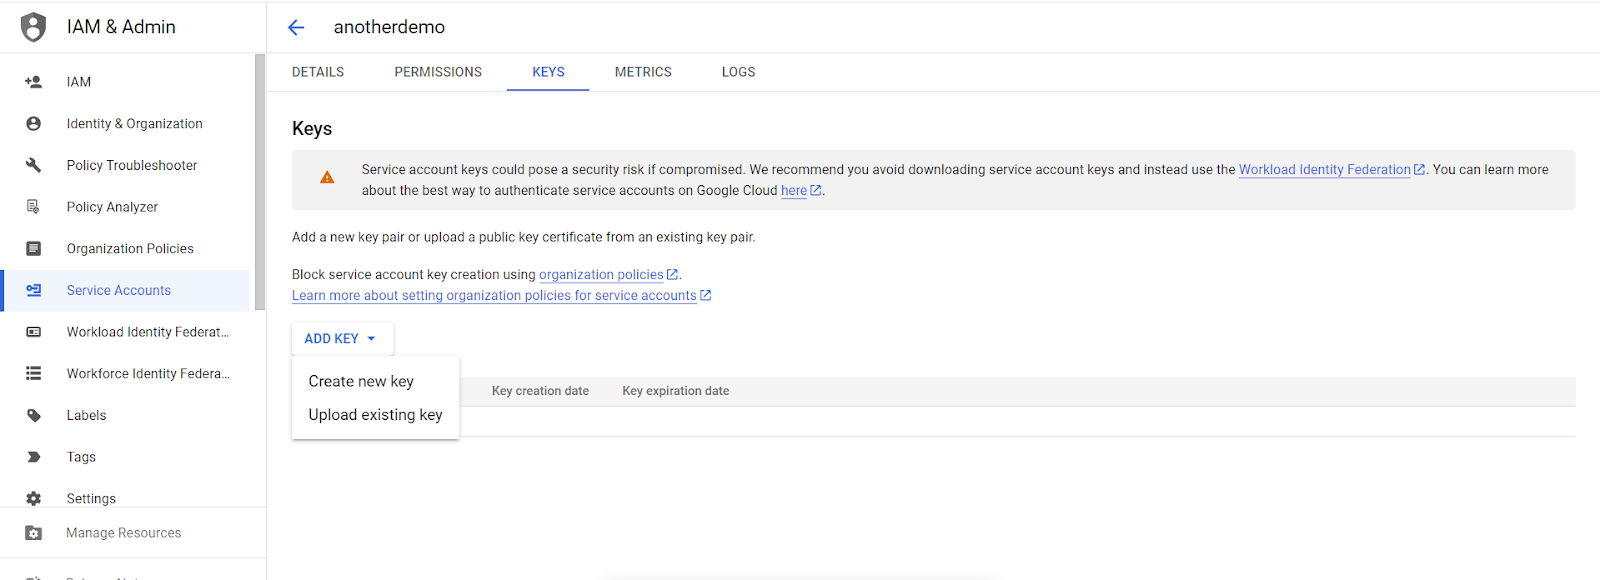
- Select JSON as key type then click on create. Your service account JSON or key JSON will automatically download.
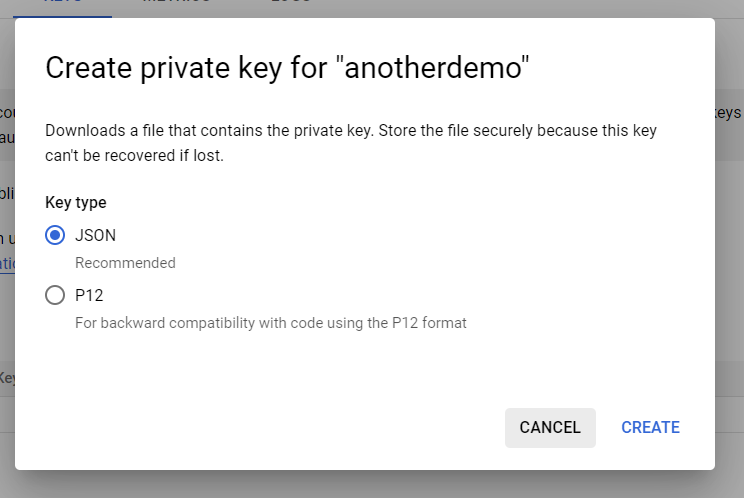
Keep it safe. You will need it later - Agent Cloud will request it (as Credential JSON) when embedding your BigQuery data.
Running Agent Cloud Locally
We need to set up Agent Cloud on our local machine to build our RAG chat app. Soon, you will have the option to use Agent Cloud’s managed cloud platform.
Use the following steps to set up Agent Cloud on your local machine:
Clone the repository
Navigate into the repository clone and run Docker Desktop.
Start Services. To start services, run the following command for Mac and Linux users. For Windows users, we recommend using WSL.
chmod +x install.sh && ./install.sh

- If everything goes well with the installation, there will be seven containers running.

❗️Heads up: Installing might take a while depending on your computer. It's a good idea to check out our docs for tips on setting up your system. You can find them here.

Once all the Docker containers are running.
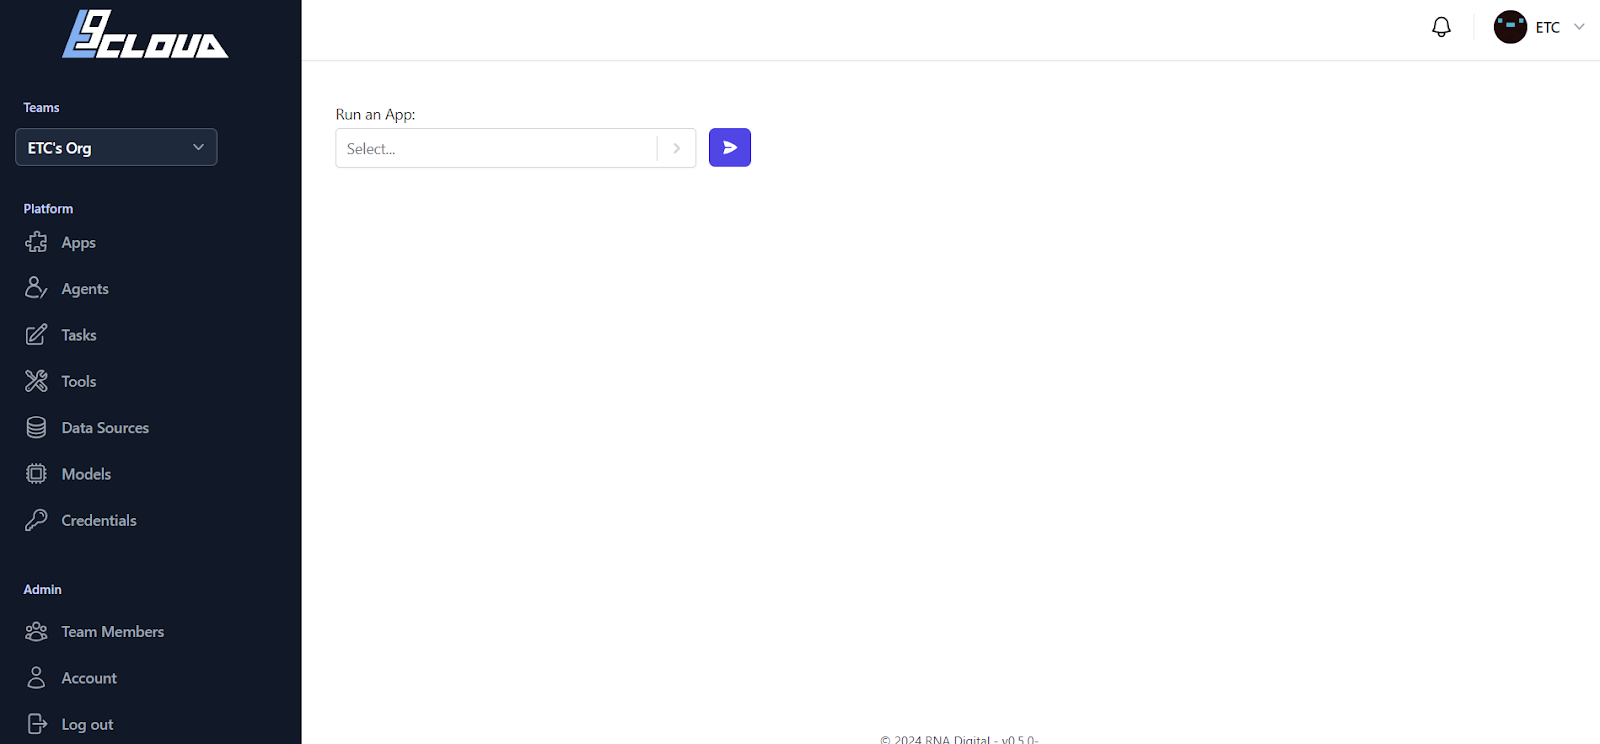
Go to http://localhost:3000 to signin/signup on Agent Cloud and start building your application.
This is what Agent Cloud looks like after logging in.
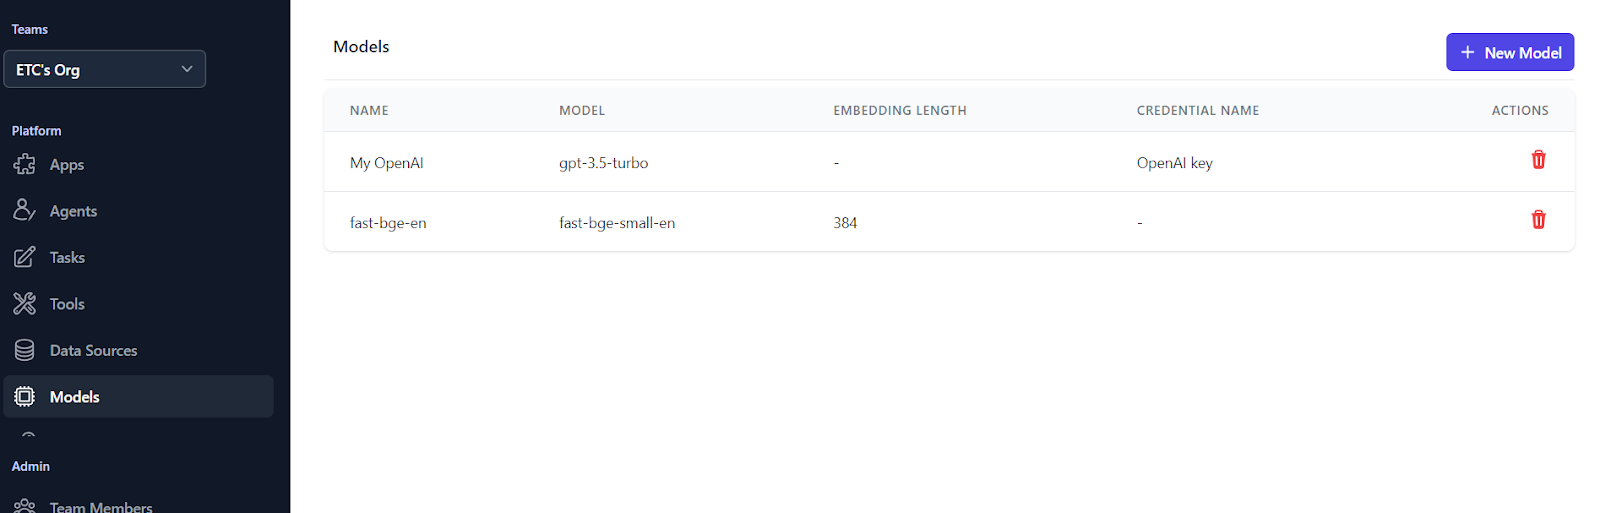
Add Your Model
Go into the Models page and add two models.
the fast embed model
an LLM
The fast embed model is a lightweight model that will run locally on your machine to split, chunk, and embed data.
For your LLM, you can use either OpenAI, Azure OpenAI, or LMStudio and add your credentials.
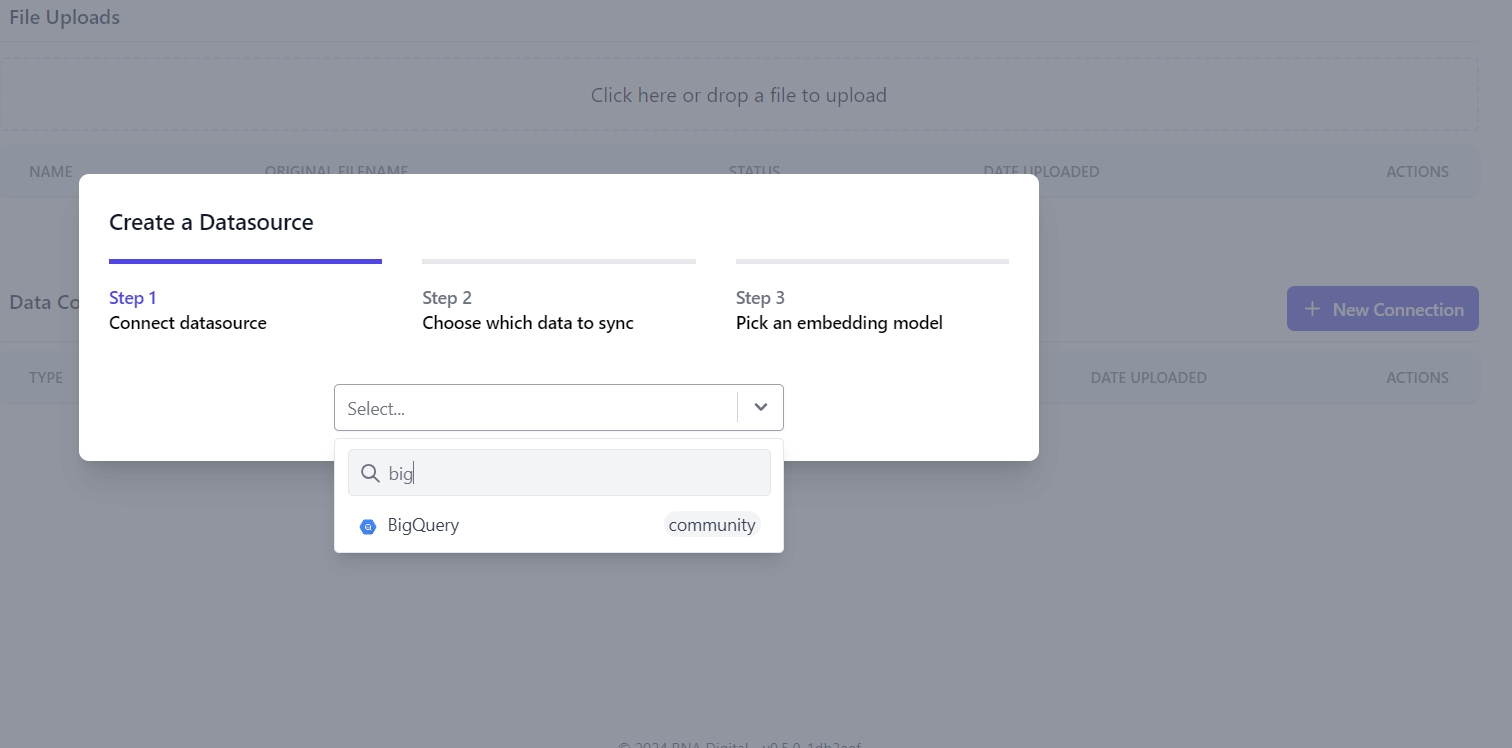
Connect Datasource
Agent Cloud allows you to split, chunk, and embed data from over 300 sources. In this case, our data source is BigQuery. Let’s connect to BigQuery.
- Navigate to the Data Sources screen and click New Connection

- Select BigQuery as your datasource
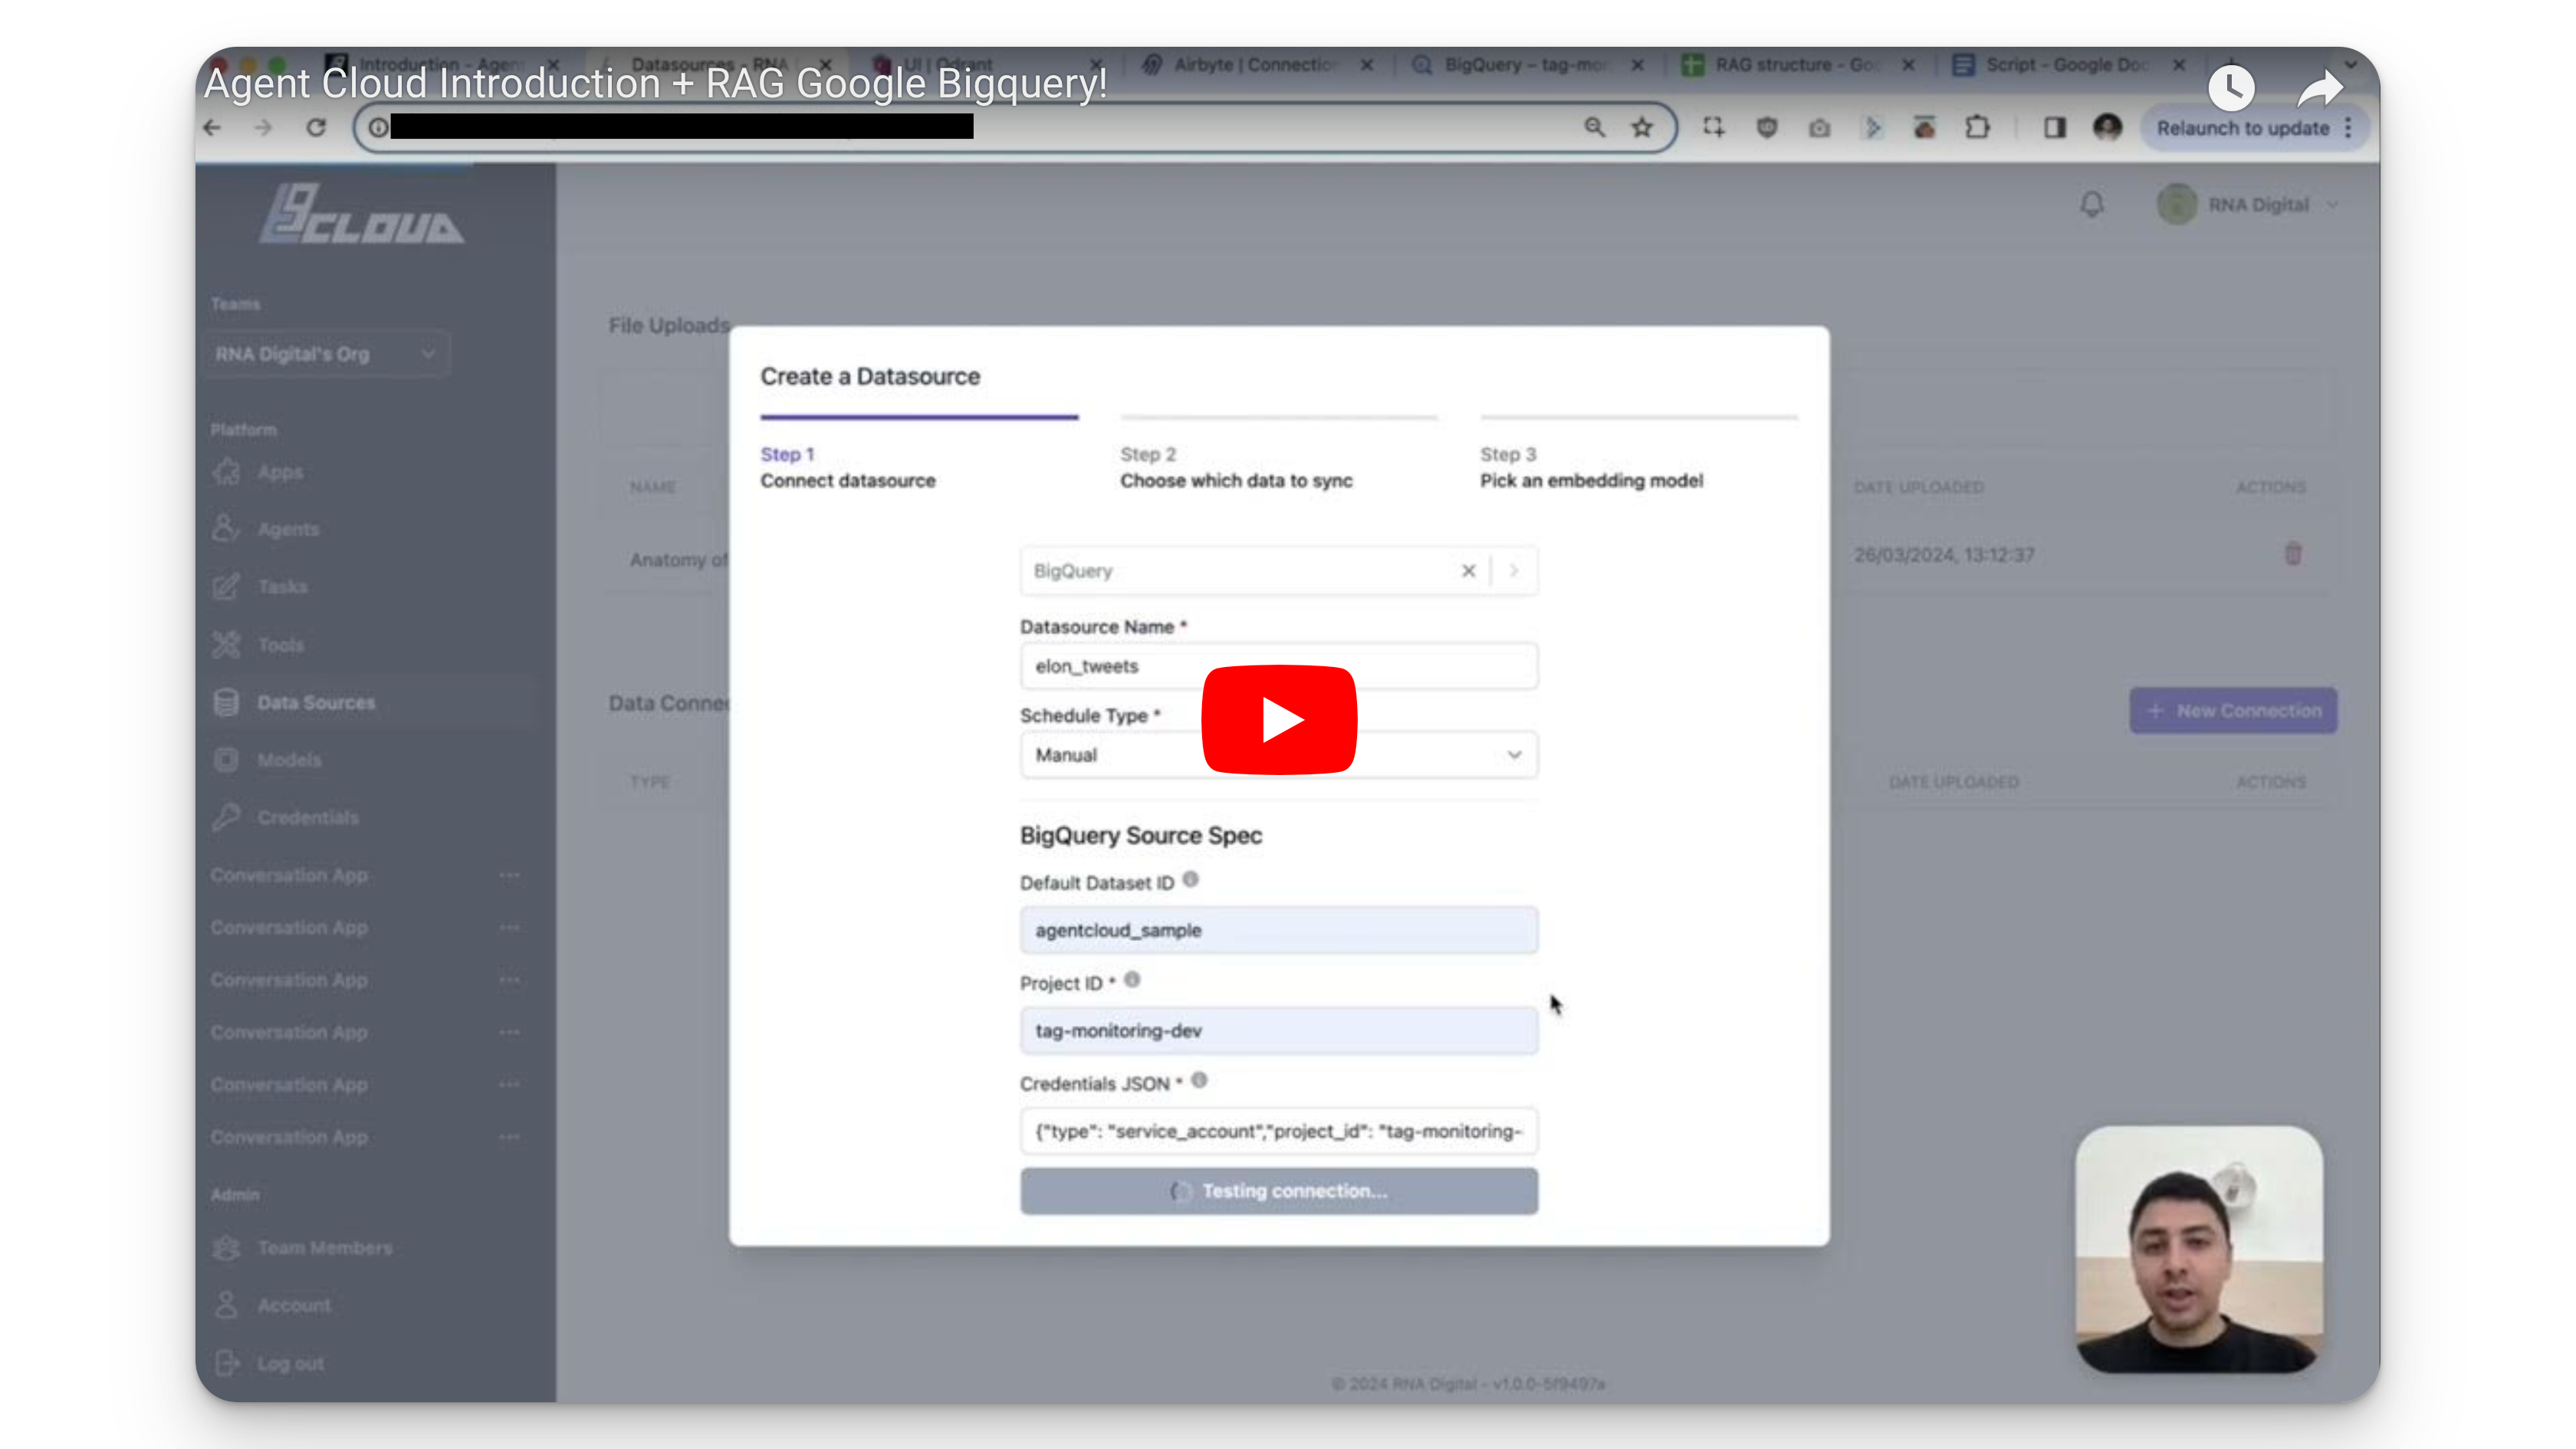
Give your datasource a name and select the sync schedule for your data (for now, you may set it to Manual).
Under the hood, Agent Cloud runs Airbyte on localhost:8000 to process your data. Other application running under the hood are Qdrant (http://localhost:6333/dashboard#/collections) and RabbitMQ (http://localhost:15672)

Add your BigQuery Dataset ID so that Airbyte won’t have to search all datasets which may take too long if you have many datasets. Enter your Google Cloud Project ID and your credentials JSON. Your credential JSON is the service account JSON you created in a previous section of this article.
Note: Ensure to convert your credential JSON to a single line code to avoid getting an error from Agent Cloud.
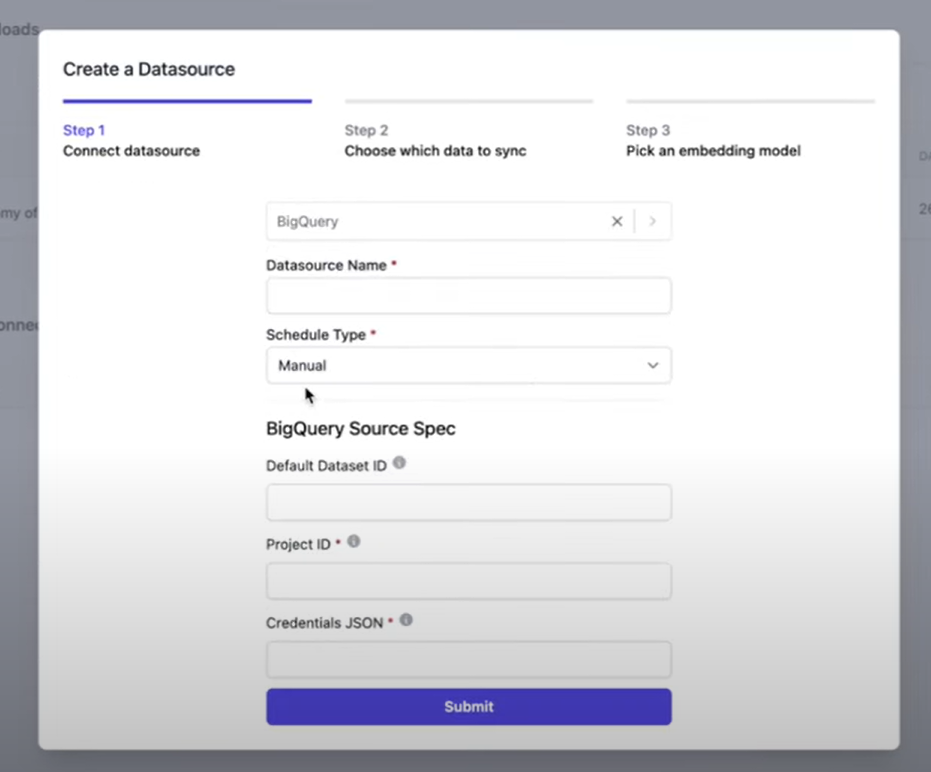
- Select tables and fields to sync. Then select your embedding model.
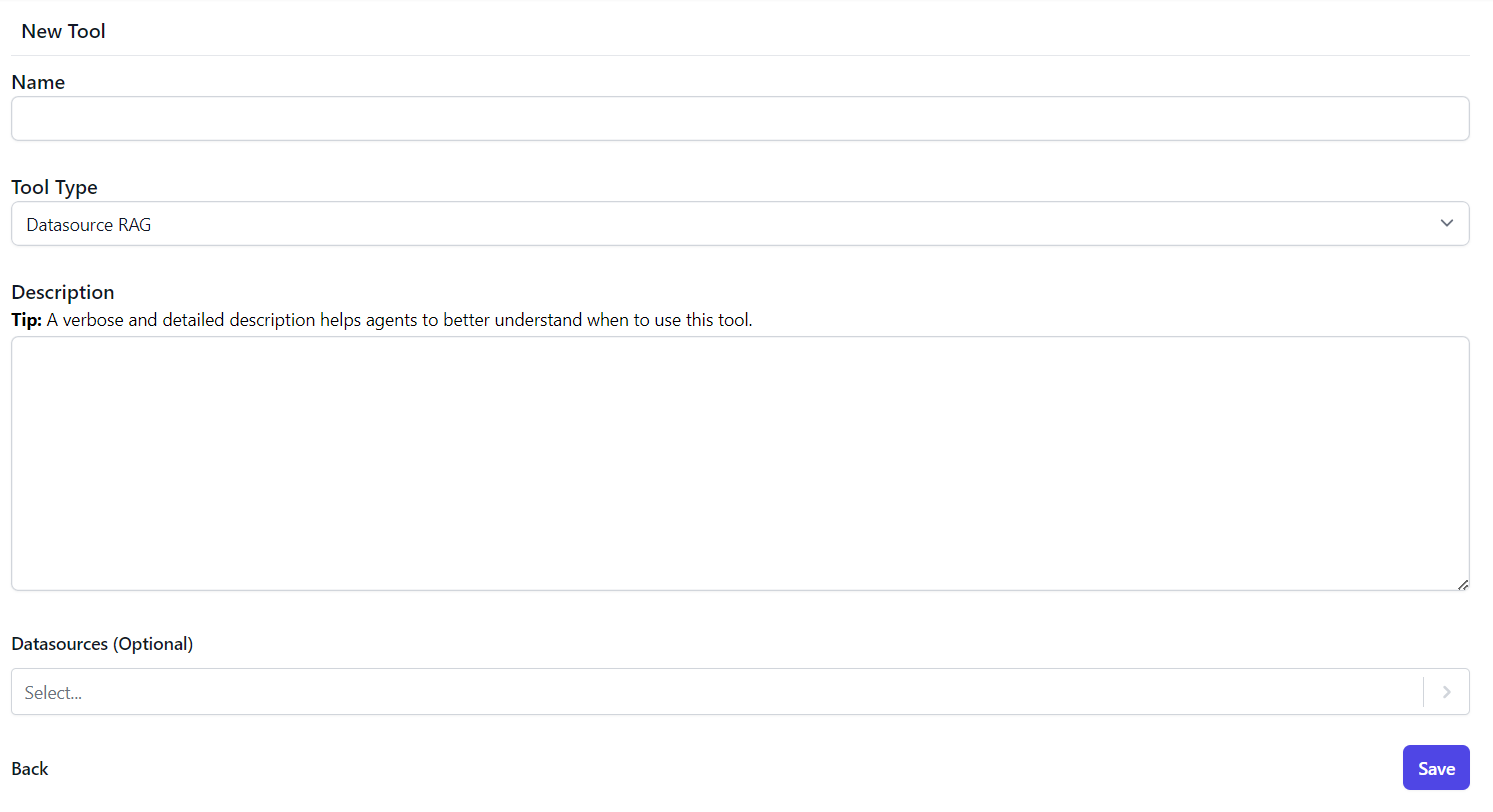
Create a Tool
Go into the Tools screen and create a new tool.
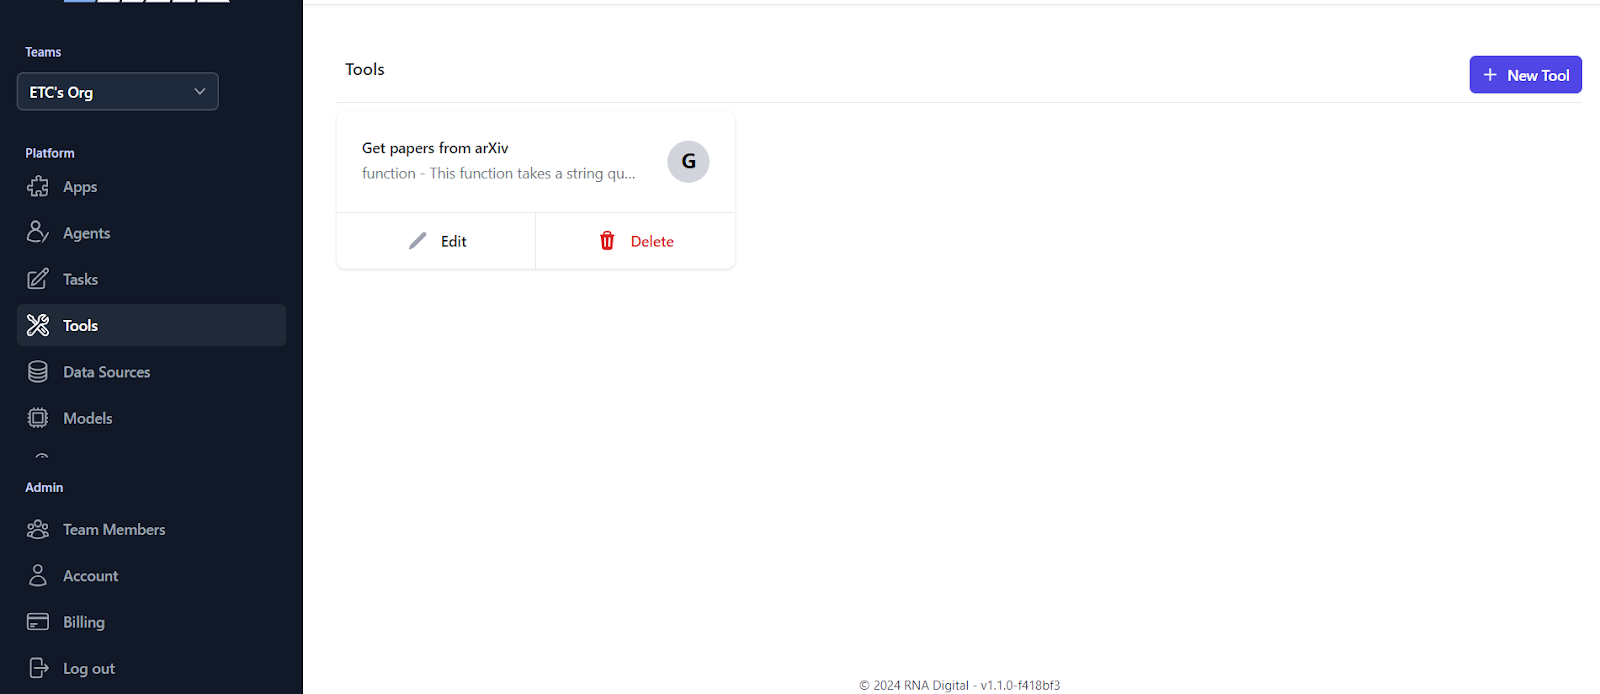
Create a detailed description of your tool. It helps the LLM decide what tool to use.
Create an Agent
Go into the Agents screen and create a new agent.
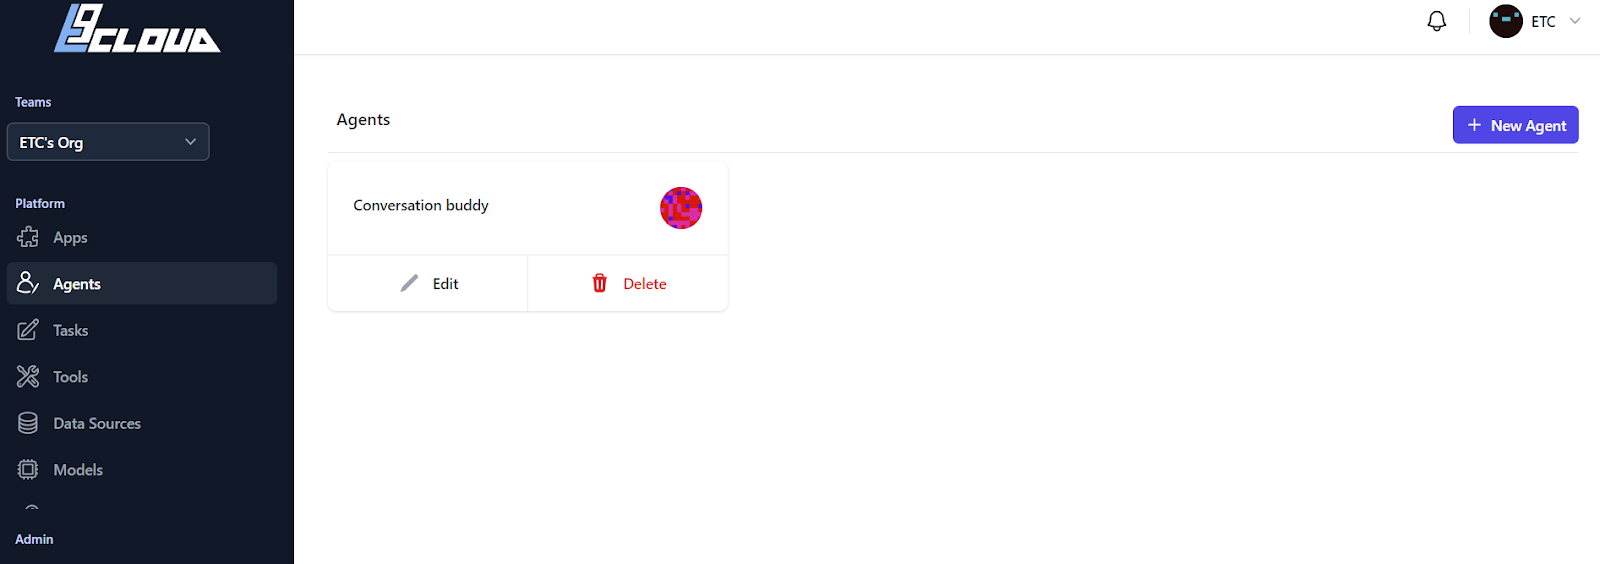
Give the Agent a Role, Goal, and Backstory. Also, select the LLM and tool you want to use. Select the RAG tool that we created earlier. Note that you can use multiple tools if you have multiple data sources.
You can use the following information for the role, goal, and backstory:
Role: You are an AI Assistant.
Goal: Have a back-and-forth conversation with the user.
Backstory: You are an Agent Cloud Assistant, a helpful assistant designed to answer questions provided by a user.

Create a Task
Navigate into the Tasks screen and set up a task.
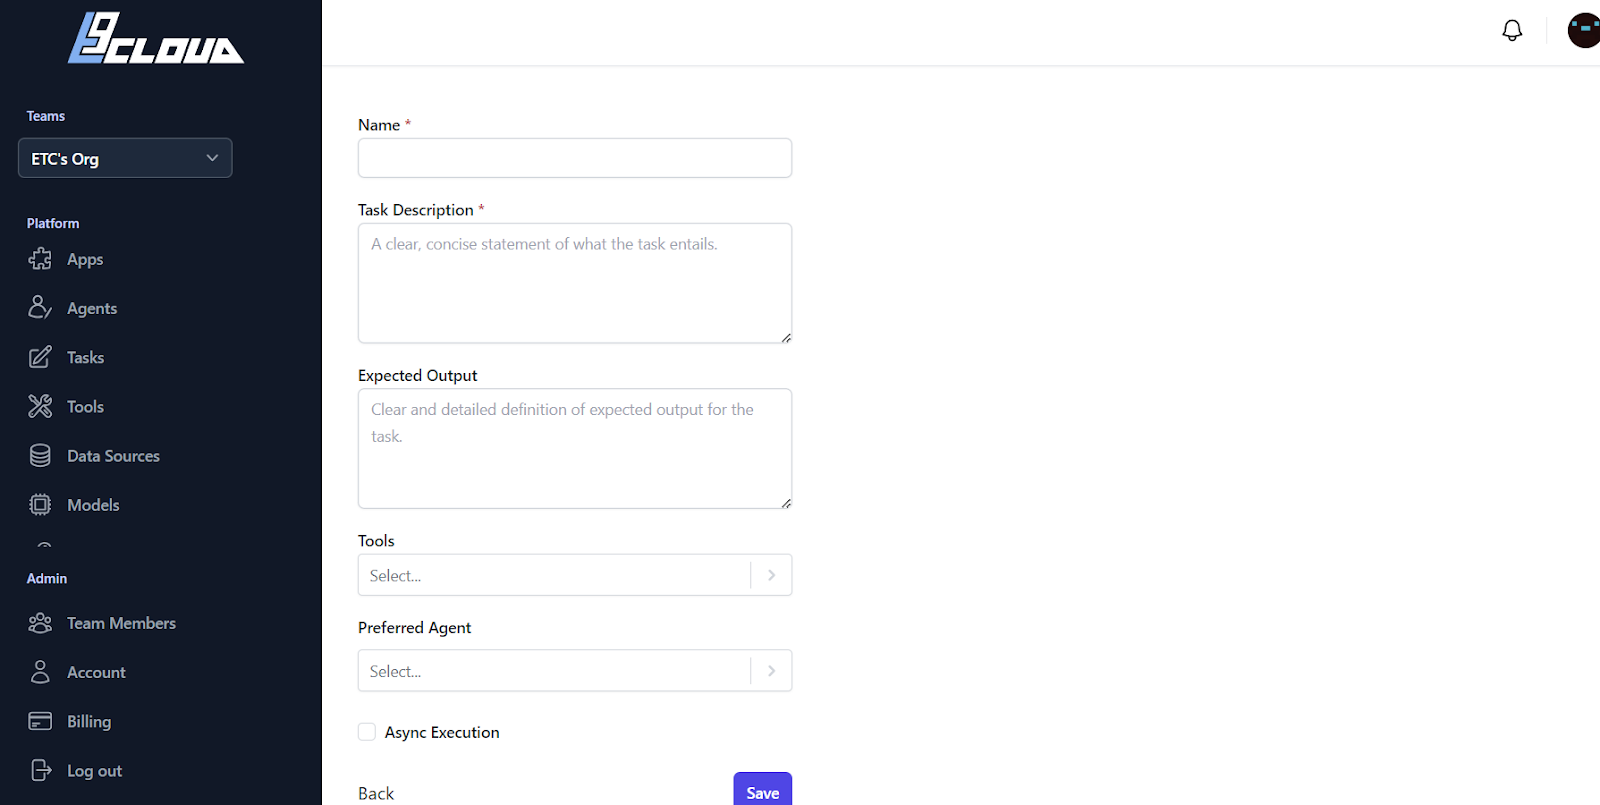
Add the following description for your task description:
Have a back-and-forth conversation with the user.
Be clear in your answers always.
If you don't know the answer, say "I do not know."
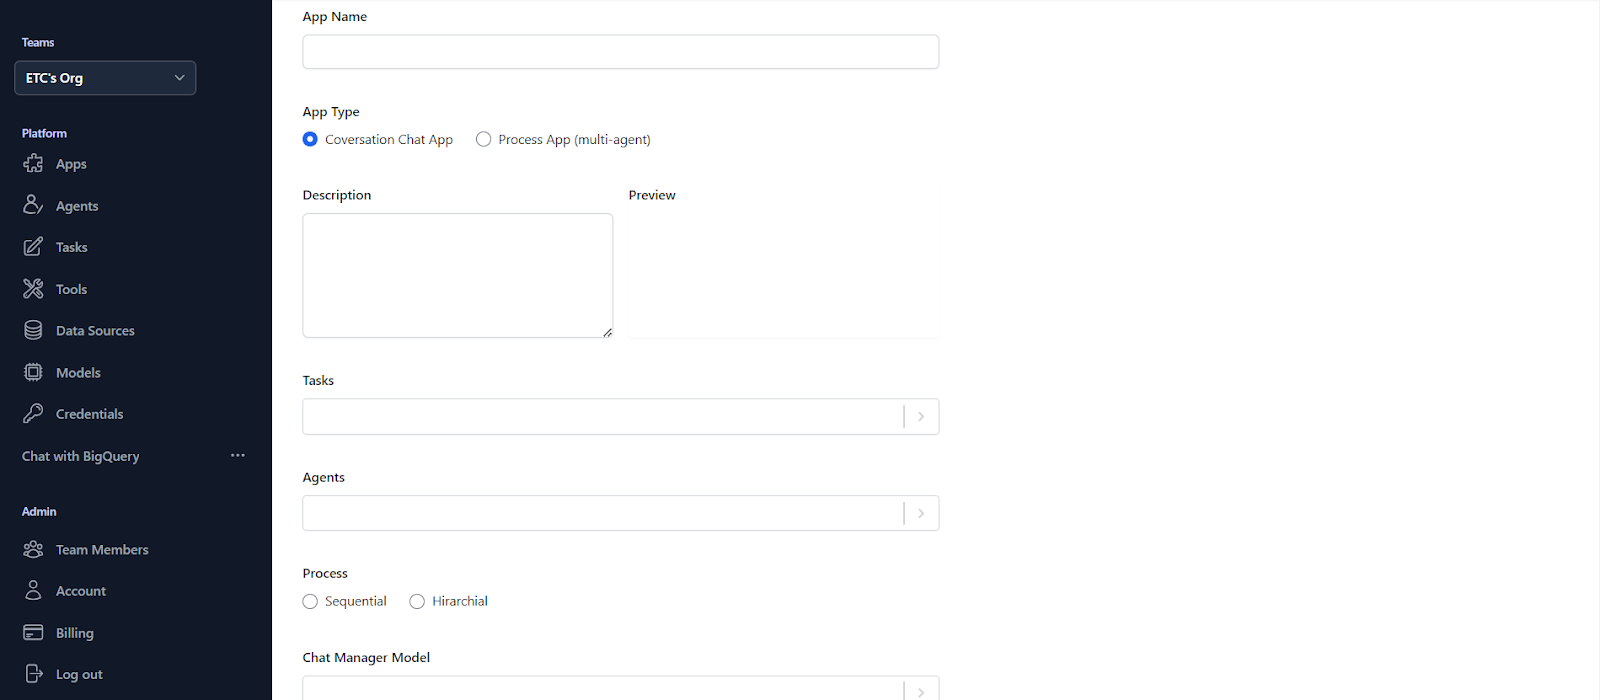
Create an App
Let’s create a conversation interface for chatting with your data. Go into the Apps and click on New App.
Select Conversation Chat App as the App Type.
Select the Conversation Agent you created earlier.
Also, select the Task you created earlier.
Select Sequential as the Process type.
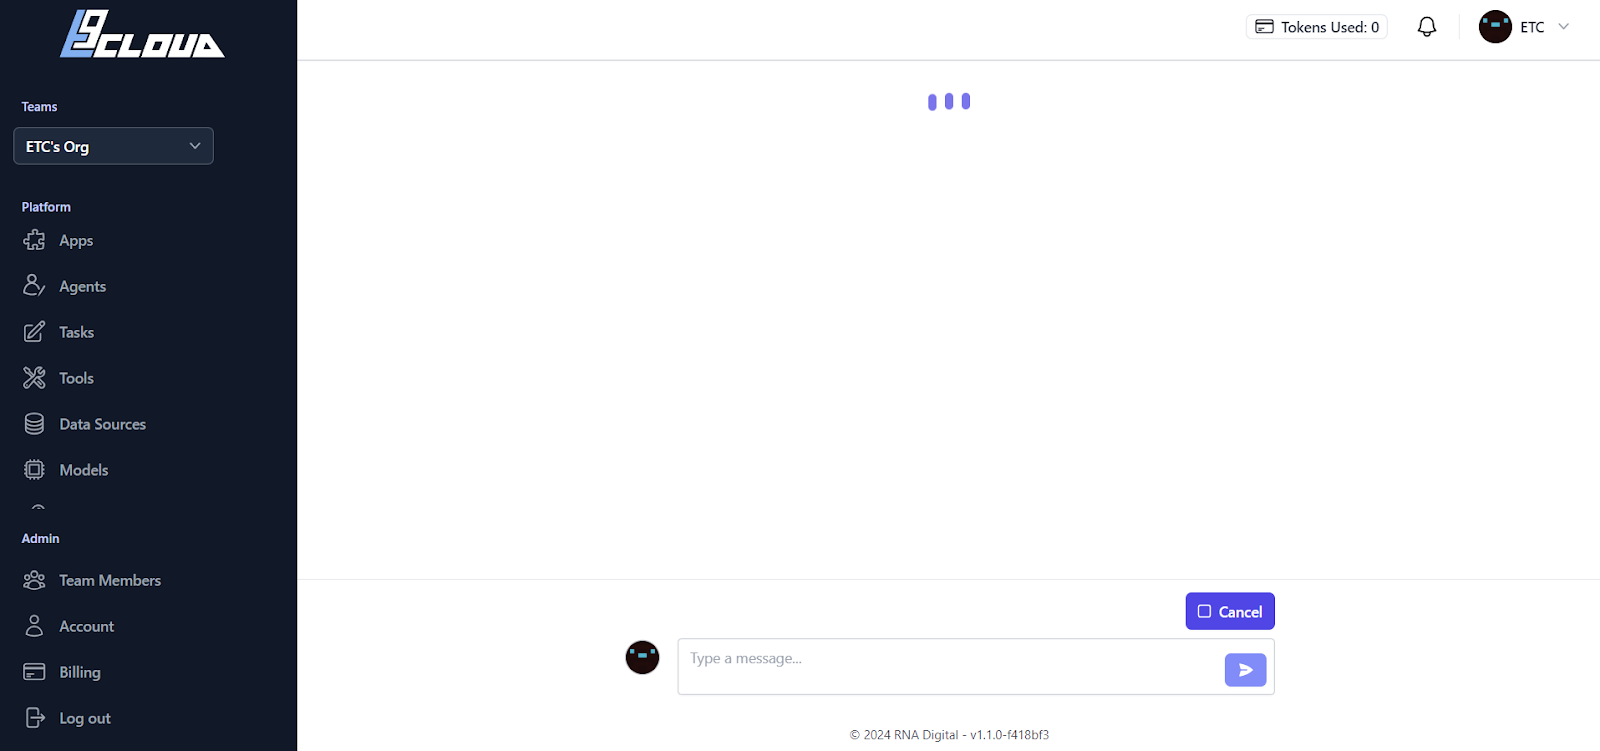
- Save the app and run it.
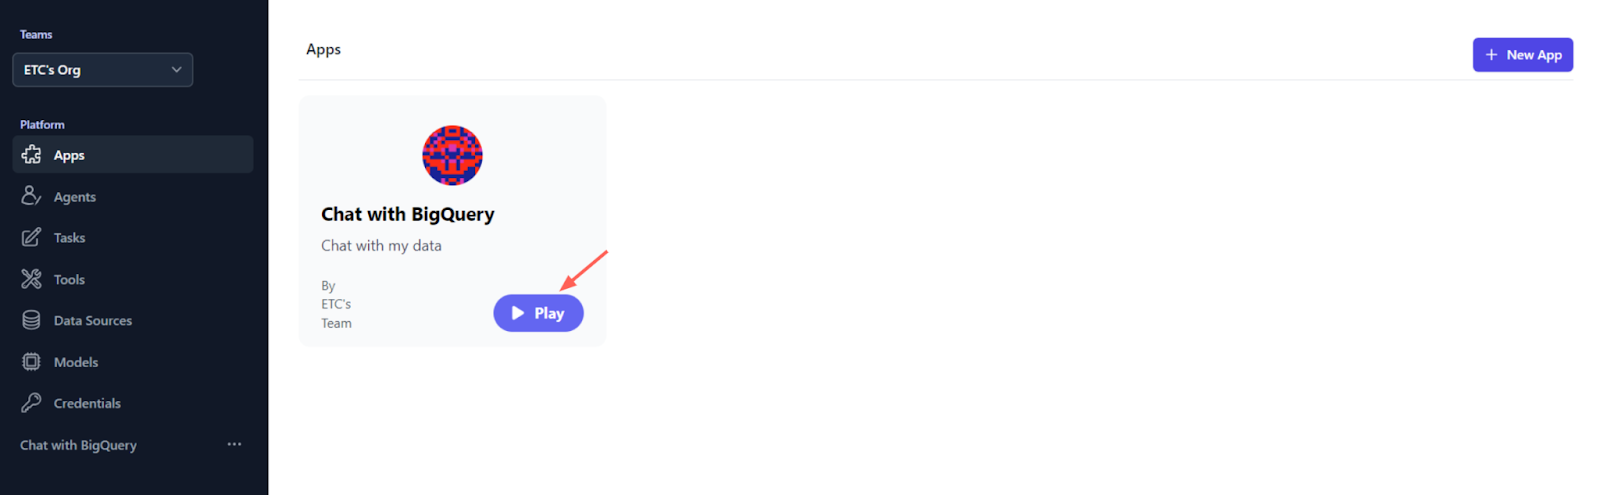
- Start chatting with your data
Want more? Check out our video tutorial! 🎥
If you prefer a visual walkthrough, we've got you covered.
Watch the complete guide on "How to Build a RAG Chat App With Agent Cloud and BigQuery" on our YouTube channel: Video Tutorial
And 👋 hey, if you have any questions or need further assistance, don't hesitate to join our Discord community.
We're here to help and chat anytime.
Join us here.
Conclusion
This article showed a step-by-step guide for building a RAG chat app with Agent Cloud and BigQuery.
Agent Cloud is an open-source generative AI platform that enables organizations and teams to build and deploy a conversation chat app for interacting with their data. The built-in RAG as a Service has a data pipeline that allows you to embed data from over 300 sources. Agent Cloud can be useful for customer service, sales automation, streamlining data analysis, improved employee onboarding, etc.
🔍 Want to learn more? Check out our comparison blogs! 📊
Explore how Agent Cloud compares with other platforms:
Discover which option suits you best ✨


